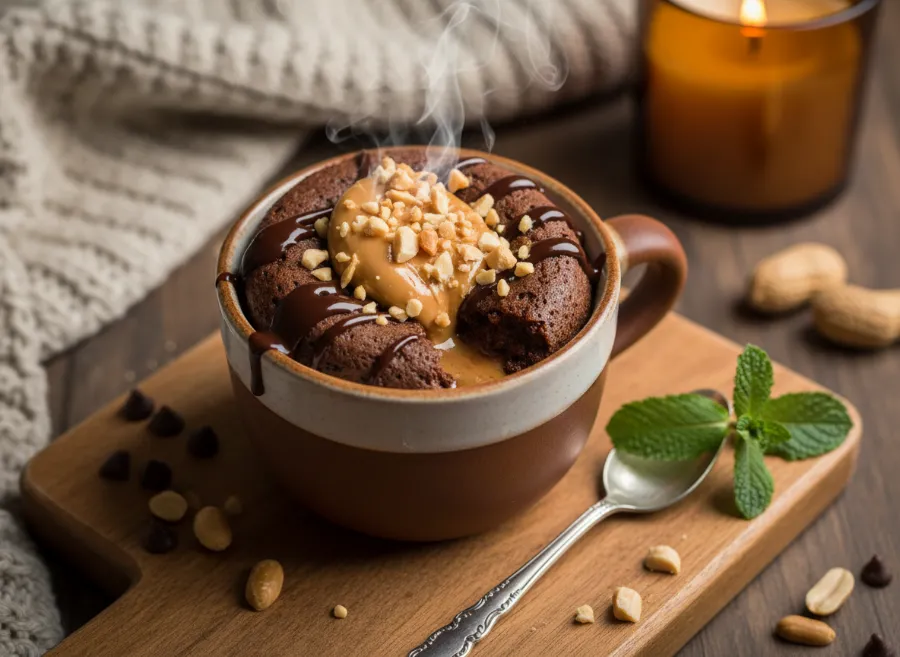
t performance standpoint, mug cake recipes consistently rank among the most saved and clicked dessert content on the platform because they offer instant gratification with minimal effort. The keto peanut butter chocolate combination is one of the most searched flavor pairings in the low-carb dessert space, and the visual of a chocolate mug cake with a melting peanut butter center is one of the most scroll-stopping food images you can create. This pin will perform exceptionally well in the Healthy Desserts and Treats category and drive consistent traffic to KetoKitchenPro.com year-round.
Why You Will Love This Keto Lava Mug Cake
Ready in 2 minutes — From measuring ingredients to eating, this dessert takes less than 3 minutes total, making it the fastest possible answer to a sweet craving on keto.
Under 5 net carbs per serving — Despite tasting like a rich, indulgent restaurant dessert, this mug cake contains only 4 to 5 grams of net carbs per serving when made with the right keto-friendly ingredients.
Molten lava center — The frozen peanut butter center creates a genuine lava cake effect that looks and tastes spectacular — warm, gooey, and completely satisfying.
Single serving — Made in one mug for one person, with no leftovers to tempt you and no baking required. Perfect for portion control and late-night cravings.
Pantry ingredients only — Every ingredient in this recipe is a standard keto pantry staple — almond flour, cocoa powder, egg, sweetener, butter, and peanut butter. No specialty shopping required.
Fully customizable — Works equally well with almond butter, sunflower seed butter, or cream cheese as the lava center for different flavor variations.
Ingredients You Will Need
This recipe makes one generous mug cake serving.
For the chocolate cake batter
- 3 tablespoons almond flour — finely ground for the best texture
- 2 tablespoons unsweetened cocoa powder — use dark cocoa for a deeper, more intense chocolate flavor
- 2 tablespoons powdered keto sweetener erythritol, allulose, or monk fruit — powdered blends more smoothly than granulated in mug cakes
- 1 large egg
- 2 tablespoons unsalted butter, melted
- 1 tablespoon unsweetened almond milk or heavy cream
- Half teaspoon vanilla extract
- Quarter teaspoon baking powder
- Pinch of salt — this small amount dramatically enhances the chocolate flavor
For the peanut butter lava center
- 1.5 tablespoons natural creamy peanut butter — no added sugar, made only from peanuts
- Optional half teaspoon powdered sweetener mixed into the peanut butter for extra sweetness
Optional toppings
- A small dollop of whipped cream made with heavy cream and sweetener
- A drizzle of melted sugar-free chocolate or sugar-free chocolate chips pressed on top before microwaving
- A pinch of flaky sea salt over the top for a salted chocolate peanut butter finish
- A dusting of cocoa powder for presentation
On the sweetener: Powdered sweetener is strongly recommended over granulated for mug cakes because it dissolves instantly into the batter without needing heat or mixing time, resulting in a smoother, more evenly sweet cake. Allulose is particularly excellent in mug cakes because it produces the most authentic sugar-like texture and does not leave a cooling aftertaste. Powdered erythritol or a monk fruit blend both work well as alternatives.
On the peanut butter center: For the best lava effect, freeze the measured peanut butter in a small ball or disk shape for at least 30 minutes before making the cake. A frozen peanut butter center stays solid during the initial cooking and then melts slowly from the heat of the surrounding cake, creating that perfect oozy lava moment. If you do not have time to freeze it, chilled peanut butter straight from the fridge also works reasonably well but produces a slightly less dramatic lava effect.
Step-by-Step Instructions
1. Freeze the peanut butter center
At least 30 minutes before making the mug cake — or the night before for best results — scoop 1.5 tablespoons of natural peanut butter onto a small piece of parchment paper. Shape it into a rough ball or flat disk using a spoon, then place on the parchment and freeze until solid. This frozen peanut butter disk is the key to the lava cake effect and is worth the advance planning.
2. Prepare the mug
Choose a microwave-safe mug with at least 12 ounce capacity — a mug that is too small will cause the batter to overflow during cooking. Lightly grease the inside of the mug with a small amount of butter or coconut oil to prevent sticking and make cleanup easier.
3. Mix the dry ingredients
Add the almond flour, cocoa powder, powdered sweetener, baking powder, and pinch of salt to the greased mug. Stir with a small whisk or fork until the dry ingredients are thoroughly combined with no lumps of cocoa visible.
4. Add the wet ingredients
Add the melted butter, egg, almond milk or heavy cream, and vanilla extract directly to the mug with the dry ingredients. Stir vigorously with a fork until a smooth, uniform batter forms with no dry pockets of almond flour or cocoa remaining. The batter should be thick and glossy, similar to a brownie batter consistency.
5. Add the frozen peanut butter center
Press the frozen peanut butter disk gently into the center of the chocolate batter, pushing it down until it is just covered by the batter on all sides. If the peanut butter is not completely submerged, spoon a little batter from the edges over the top to cover it. The goal is to have the peanut butter surrounded by chocolate batter on all sides so it creates a molten center rather than melting off the top.
6. Microwave the mug cake
Microwave on high power for 60 to 75 seconds. The exact time will vary depending on your microwave wattage — start with 60 seconds and check the result. The cake is done when the edges and top are set and not wet-looking, but the very center still looks slightly underdone and jiggly. Do not overcook — an overcooked mug cake becomes dry and rubbery rather than fudgy and moist. If the center still looks very wet after 60 seconds, microwave in additional 10-second intervals until just set around the edges.
7. Rest for 60 seconds
Remove the mug from the microwave carefully as it will be very hot and let it rest for 60 seconds before eating. This brief resting period allows the lava center to settle and reach the perfect temperature for eating, and allows the outer cake to finish setting from residual heat.
8. Add toppings and serve
Top with a small dollop of sugar-free whipped cream, a drizzle of melted sugar-free chocolate, and a pinch of flaky sea salt if desired. Eat directly from the mug with a spoon, and experience the lava moment when you break through the top of the cake and the warm peanut butter flows out. Eat immediately while warm for the best texture and the most dramatic lava effect.
Serving Ideas and Pairings
For the ultimate keto dessert experience: Top with a scoop of no-sugar-added vanilla ice cream or a large dollop of whipped heavy cream sweetened with a touch of sweetener — the contrast of warm lava cake and cold cream is extraordinary.
For a more indulgent presentation: Transfer the mug cake to a small dessert plate by running a knife around the edge and inverting — then drizzle with sugar-free chocolate sauce and dust with cocoa powder for a plated restaurant-style presentation.
For a snack version: Make the recipe with slightly less sweetener and no toppings for a less indulgent, more snack-appropriate version that still satisfies chocolate and peanut butter cravings completely.
Flavor Variations
Almond butter lava mug cake — Replace the peanut butter center with almond butter for a slightly different nutty flavor that is equally delicious and works well for those avoiding peanuts.
Cream cheese lava mug cake — Use a frozen disk of sweetened cream cheese as the center instead of peanut butter for a cheesecake-inspired lava effect that is incredibly rich and creamy.
Mocha lava mug cake — Add half teaspoon of instant espresso powder to the dry ingredients for a coffee-chocolate variation that intensifies the chocolate flavor beautifully.
Raspberry chocolate lava mug cake — Press two or three fresh raspberries into the center alongside the peanut butter for a fruity, slightly tart contrast to the rich chocolate batter.
Double chocolate lava mug cake — Replace the peanut butter center with a small frozen ball of sugar-free chocolate mixed with cream cheese for a pure chocolate lava experience.
How to Fit This Into a Keto Plan
- Net carbs: About 4 to 5 grams per serving, primarily from the almond flour and cocoa powder
- Protein: Around 8 to 10 grams from the egg and peanut butter
- Fat: High from butter, egg yolk, and peanut butter — supports ketosis and provides satisfying energy alongside the dessert
This mug cake is designed as a single-serving dessert and fits comfortably into a daily keto macro budget without impacting ketosis when made with the specified ingredients. The combination of healthy fat from peanut butter and butter, moderate protein from the egg, and very low net carbs makes it one of the most macro-friendly keto desserts available.
Meal Prep and Storage
Best fresh: Mug cakes are designed to be made fresh and eaten immediately. The texture is at its absolute best — fudgy, moist, and with a melty lava center — right out of the microwave.
Make-ahead tip: You can pre-mix the dry ingredients in a small jar or ziplock bag in advance so the only steps needed at dessert time are adding wet ingredients and microwaving. Pre-freeze several peanut butter disks at once and store in the freezer so they are always ready when the craving strikes.
Storage: Cooked mug cake can be covered and stored in the fridge for up to 2 days and reheated in the microwave for 20 to 30 seconds, though the lava effect will not be as dramatic on reheating.
Tips for Perfect Keto Lava Mug Cake Every Time
- Freeze the peanut butter center in advance — this is the single most important step for a dramatic lava effect.
- Use a large enough mug — a mug that is too small will overflow during cooking.
- Do not overcook — start at 60 seconds and add time in 10-second increments only if needed. Overcooked mug cake is dry and rubbery.
- Use powdered sweetener — granulated sweetener does not dissolve as well and can leave a gritty texture in a quick-cook mug cake.
- Use finely ground almond flour — coarser almond meal produces a grainier, less cake-like texture.
- Let it rest 60 seconds before eating — this makes the center perfectly warm and melty rather than scalding hot.